
As a CNC engineer at HH Plastic Metal Co., Ltd, the process of transforming a Computer-Aided Design (CAD) file into a fully operational 40-ton plastic injection mould tool is a complex, highly precise journey. It involves various stages of design, machining, assembly, and testing to ensure the mould tool meets the demanding requirements of mass production in the plastic injection industry. Here’s an overview of the process, broken down into key steps:
1. CAD Design Review and Feasibility Analysis
The process starts with receiving the CAD file from the client or internal design team. This file is a detailed 3D model of the plastic part that will be produced by the injection mould. Our role begins by ensuring the mould design is feasible for manufacturing and suitable for high-volume production.
- Design Verification: The engineering team evaluates the CAD model, checking dimensions, tolerances, wall thickness, undercuts, and material flow patterns to ensure it can be successfully moulded. Special attention is given to aspects like shrinkage, cooling time, and any potential defects such as warping or sink marks.
- Mould Flow Analysis (MFA): We run simulation software (such as Moldflow) to predict how molten plastic will behave inside the mould. This analysis helps us determine optimal gate placement, cooling channel layout, and ejection system design. The goal is to minimize defects and ensure consistent, high-quality production.
2. Mould Design and Engineering
Once the CAD model is verified and the moulding process analyzed, we move on to designing the injection mould tool. This involves creating a multi-part mould that is robust enough to withstand repeated high-pressure injections while ensuring precise, consistent production.
- Core and Cavity Design: The mould tool consists of two main parts, the core and the cavity, which will form the external and internal surfaces of the plastic part. These are designed with tight tolerances to ensure perfect alignment and sealing during the injection process.
- Ejection System: We design the ejection pins, which push the cooled, solidified plastic part out of the mould after the injection cycle. This system must be designed carefully to avoid damaging the part during ejection.
- Cooling Channels: To speed up the moulding cycle, we design a series of internal cooling channels. These channels ensure even cooling of the plastic part, reducing cycle times and preventing warping or shrinkage.
Once the mould design is completed, the design file is translated into a Computer-Aided Manufacturing (CAM) program that will control the CNC machines.
3. Material Selection and Preparation
For a mould tool weighing 40 tons, the selection of materials is critical to ensuring durability and performance.
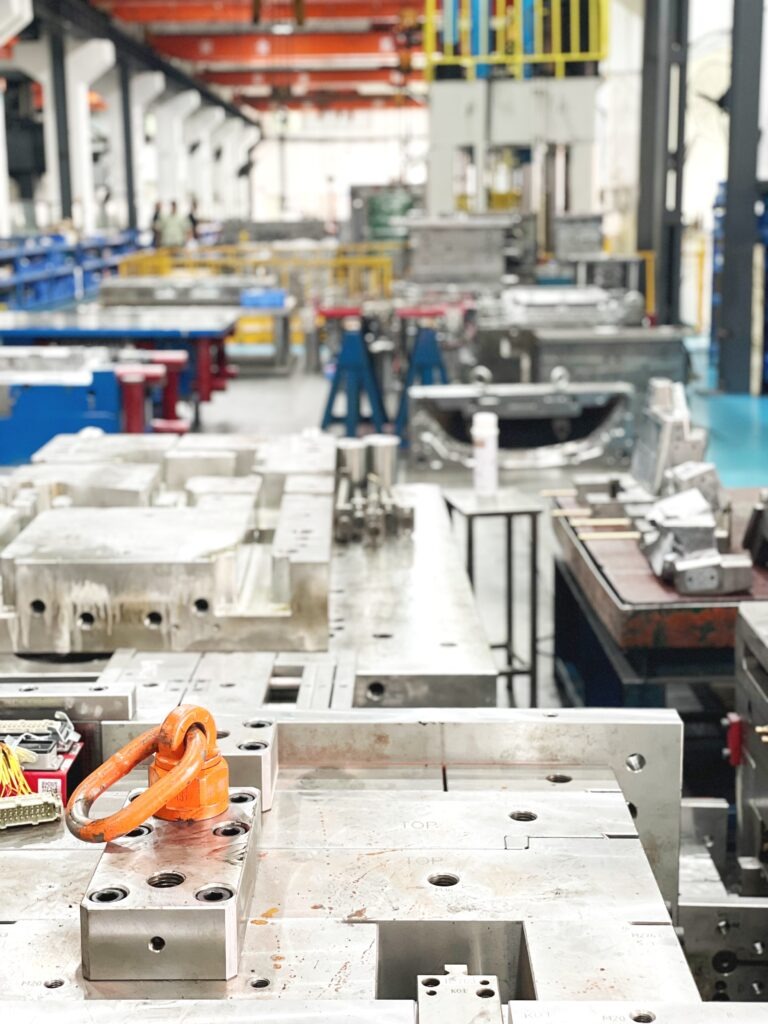
- Tool Steel Selection: The most common material for mould tools is high-grade tool steel such as P20, H13, or stainless steel, which offers high strength, wear resistance, and thermal conductivity. The choice of material depends on the expected volume of production, the type of plastic used, and the complexity of the part.
- Material Treatment: In many cases, materials are treated (e.g., hardened, tempered, or nitrided) to improve wear resistance, reduce friction, and enhance longevity.
The raw steel blocks are sourced, inspected, and prepared for machining.
4. CNC Machining of Mould Components
This is the most critical phase where we convert the CAD/CAM data into physical mould components. CNC machines, such as 3-axis, 5-axis milling machines, EDM (Electrical Discharge Machines), and grinding machines, are used to shape the steel blocks into precision mould components.
-
Rough Machining: In this step, large chunks of material are removed from the steel blocks to roughly shape the core and cavity. Heavy-duty CNC milling machines are used to create the basic forms.
-
Precision Machining: After the rough cut, precision CNC milling is used to achieve the final shape, including fine details, sharp corners, and complex geometries. Tolerances are often held within microns to ensure the accuracy of the mould.
-
Electrode Creation and EDM: For intricate features that are hard to machine (e.g., deep cavities or thin ribs), we use EDM. First, copper or graphite electrodes are machined, and then EDM is employed to burn these features into the mould steel with precision.
-
Polishing and Surface Finishing: Once the main components are machined, the surfaces are polished or textured according to the product’s requirements. Surface finishes can range from mirror-polished (for high-gloss parts) to textured (for a matte finish).
5. Mould Assembly
Once all components are machined, the tool moves to the assembly stage.
- Fitting and Aligning: The core and cavity, along with inserts, ejector pins, guide pins, and the cooling system, are assembled. During this stage, the parts are carefully aligned and fitted to ensure perfect mating during the injection process.
- Hydraulic Systems and Hot Runners: If the design requires, hydraulic systems are installed for side actions (moving parts of the mould during injection). In the case of hot runner systems (used to inject molten plastic directly into the cavities), heating elements and controllers are installed.
- Final Testing: Once assembled, the tool undergoes initial inspection to ensure all components are functioning correctly, including the ejection system, guide pins, and cooling channels.
6. Mould Testing and Validation
Before mass production begins, the mould tool undergoes rigorous testing through Trial Injection Moulding. This ensures that the tool performs as expected in a real-world injection moulding machine.
- T1 Samples: The first test run produces T1 samples, which are evaluated for quality, consistency, and dimensions. Any defects, such as warping, flashing, or short shots, are analyzed, and the mould is fine-tuned to correct these issues.
- Cycle Time Optimization: The injection process is adjusted to optimize cycle times, ensuring that production can run efficiently without compromising quality.
- Final Adjustments: Any necessary adjustments to the mould or injection parameters are made to ensure the tool will meet production requirements for both part quality and output efficiency.
7. Quality Control and Certification
After successful validation, the mould is subjected to final quality control checks. These checks verify that all components are functioning perfectly and that the tool meets the required specifications for mass production.
- Dimensional Verification: Precision measurement tools like CMM (Coordinate Measuring Machines) are used to confirm that the mould tool and the plastic parts it produces meet exact dimensional tolerances.
- Stress Testing: The tool may undergo stress tests to ensure it can withstand the pressures of repeated injections, especially important for a 40-ton tool intended for high-volume production.
8. Delivery and Maintenance Plan
With the tool approved, it is prepared for shipping to the production facility. At HH Plastic Metal Co., Ltd, we also provide a maintenance schedule for the customer to ensure that the mould remains in optimal condition throughout its production life. This schedule includes routine cleaning, lubrication, and inspections to prevent wear and tear, which is critical for tools of this scale and investment.
Conclusion
Converting a CAD file into a finished 40-ton plastic injection mould tool involves a meticulous, multi-stage process that demands precision, expertise, and careful planning. From initial design validation to CNC machining, assembly, testing, and final delivery, every step is crucial in ensuring that the mould will perform reliably under the rigorous demands of mass production.
At HH Plastic Metal Co., Ltd, we leverage advanced CNC technologies, skilled craftsmanship, and a commitment to quality to ensure that each mould tool we produce meets the highest standards of precision and durability. By combining design intelligence with state-of-the-art manufacturing, we help clients transform their ideas into mass-produced realities, ready to shape millions of plastic parts for industries around the world.
